Ultimate 7 Smart Ways Better Audio Elevates Home Tour Videos
Discover 7 smart ways better audio elevates home tour videos. Deep dive into recording techniques, equipment choices, post-production workflows, and how superior sound drives engagement and conversions in real estate video.

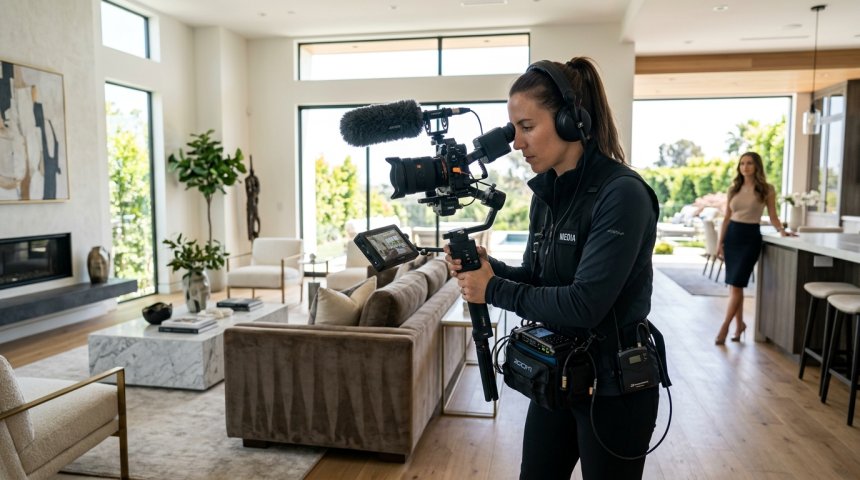
There's an uncomfortable truth that most real estate videographers and agents refuse to acknowledge: your viewers are judging your property videos by their ears before their eyes register the granite countertops or the vaulted ceilings. Audio is the invisible architect of emotional response in home tour videos, and when it's neglected, even the most beautifully shot footage feels amateurish, untrustworthy, and ultimately forgettable. Viewers might not be able to articulate why a video made them click away after fifteen seconds, but their subconscious already decided—the echoey narration, the wind buffeting the microphone, the muffled room tone, the inconsistent volume levels—all of it signaled "low quality" before the camera ever panned across the master bedroom.
Better audio doesn't just make home tour videos sound better. It makes properties feel more valuable, agents seem more professional, and viewers stay longer, engage deeper, and convert faster. The difference between a video that generates inquiries and one that gets scrolled past often has nothing to do with lighting, composition, or staging—and everything to do with sound.
This guide dissects seven smart, actionable ways that better audio elevates home tour videos from forgettable content to conversion-generating assets. We'll move beyond generic advice like "use a good microphone" and explore the psychological, technical, and strategic dimensions of audio excellence in real estate video. Whether you're a solo agent shooting tours on your phone, a professional videographer serving luxury markets, or a marketing team managing hundreds of listing videos, these seven strategies will transform how you think about, capture, and leverage audio to make every property video work harder for your business.
Let's start with the foundation: understanding why audio matters more than most creators realize.
Chapter 1: Why Audio Is the Secret Weapon of High-Converting Home Tours
Before diving into the seven strategies, we need to establish why audio deserves this level of attention. The case for audio investment isn't subjective preference—it's rooted in cognitive science, viewer behavior data, and conversion psychology.
The Cognitive Primacy of Sound
Human brains process audio faster than visual information. Sound reaches the brain's emotional centers before visual cortex processing completes, meaning viewers form emotional impressions of your video based on audio before they've consciously registered what they're seeing. A warm, clear voiceover triggers trust and comfort; harsh, distorted audio triggers discomfort and distrust—regardless of how beautiful the visuals are.
This cognitive primacy means audio sets the emotional frame through which all subsequent visual information is interpreted. The same kitchen shot feels inviting with warm narration and gentle ambient sound, but sterile with flat audio and mechanical silence. The same backyard feels serene with birdsong and soft breeze, but empty with dead silence or distracting traffic noise. Audio doesn't accompany visuals—it contextualizes them.
Viewer Retention and Watch Time
Platform algorithms prioritize watch time and retention above almost all other metrics. Videos that lose viewers in the first ten seconds get buried; videos that maintain engagement get promoted. Audio quality is one of the strongest predictors of early retention.
Viewers tolerate mediocre visuals far longer than they tolerate poor audio. A slightly underexposed shot with clear, engaging narration keeps viewers watching; a perfectly exposed shot with muffled, echoing audio loses them instantly. This asymmetry exists because bad audio is physically uncomfortable to listen to, while imperfect visuals are merely aesthetically suboptimal. Physical discomfort triggers immediate abandonment; aesthetic imperfection triggers mild disappointment that viewers can overlook.
For real estate videos, where the goal is keeping viewers engaged long enough to absorb property details and feel motivated to inquire, audio quality directly determines whether your content achieves its purpose or fails at the threshold.
Trust and Professional Perception
Real estate transactions involve significant financial and emotional stakes. Viewers evaluating properties through video are simultaneously evaluating the agent or agency behind the video. Audio quality serves as a proxy for professionalism, attention to detail, and respect for the viewer's time.
Clear, well-produced audio signals competence. It tells viewers: "This agent invests in quality. They care about presenting this property properly. They respect my time enough to make this experience pleasant." Poor audio signals the opposite: "This agent cuts corners. They didn't bother to get this right. What else did they neglect?"
In competitive markets where dozens of similar properties compete for attention, audio quality becomes a differentiator that influences which agent gets the inquiry—not because viewers consciously chose based on audio, but because audio shaped their perception of trustworthiness and professionalism at a subconscious level.
Emotional Resonance and Property Valuation
Properties aren't just physical structures—they're emotional experiences. Buyers don't purchase square footage; they purchase feelings of safety, comfort, belonging, and aspiration. Audio is the primary vehicle for conveying these feelings in video.
The right audio transforms a house into a home. Gentle ambient sound conveys livability. Warm narration conveys welcome. Strategic music conveys aspiration. Silence, used intentionally, conveys peace. Each audio choice shapes the emotional narrative that determines whether viewers can imagine themselves living in the space.
This emotional resonance directly impacts perceived property value. The same property presented with flat, lifeless audio feels worth less than the same property presented with rich, immersive audio. Buyers may not consciously attribute higher valuation to audio quality, but their emotional response—which drives offer prices and urgency—is profoundly influenced by it.
Key Insight: Audio isn't a production detail—it's a conversion lever. Every dollar invested in better audio yields returns through increased watch time, higher trust, stronger emotional connection, and ultimately more inquiries and closings. The ROI on audio investment often exceeds the ROI on visual upgrades because audio affects viewer psychology at a deeper, faster, and more durable level.
Strategy 1: Master Ambient Sound Capture to Create Spatial Authenticity
The first smart way better audio elevates home tour videos is through intentional ambient sound capture that creates spatial authenticity—the feeling that viewers are physically present in the space rather than watching a flattened representation of it.
Why Ambient Sound Matters
Silence in home tour videos doesn't feel peaceful—it feels artificial. Real spaces have sonic signatures: the hum of HVAC systems, the distant murmur of neighborhood life, the subtle resonance of room dimensions, the texture of flooring underfoot. These ambient sounds communicate spatial information that visuals alone cannot: room size, ceiling height, material quality, insulation effectiveness, neighborhood character.
When ambient sound is absent or poorly captured, viewers experience cognitive dissonance. Their eyes see a three-dimensional space, but their ears receive no confirming spatial cues. This dissonance creates unease and reduces immersion. When ambient sound is present and authentic, viewers' brains receive congruent multisensory input that reinforces spatial perception and enhances presence.
Capturing Authentic Ambient Sound
Authentic ambient sound requires intentional capture during filming, not synthetic addition in post-production. Synthetic ambient libraries rarely match the specific acoustic signature of a filmed space, creating subtle mismatches that viewers sense even if they can't identify.
Room Tone Recording: Every room has unique acoustic characteristics determined by dimensions, materials, and furnishings. Record thirty to sixty seconds of "room tone"—the ambient sound of each space with no active sound sources—in every room you film. This room tone serves multiple purposes: it provides authentic ambient beds for editing, enables seamless audio transitions between shots, and preserves the unique sonic fingerprint of each space.
Record room tone with the same microphone and settings used for primary audio to ensure tonal consistency. Capture room tone at multiple points in larger rooms, as acoustics vary within spaces. Record room tone with HVAC systems both on and off, as both states are part of the lived experience of the space.
Environmental Context Capture: Beyond interior room tone, capture environmental context that situates the property in its surroundings. Birdsong from the backyard, distant ocean waves, neighborhood ambiance, wind through trees—these contextual sounds communicate location, lifestyle, and atmosphere that visuals alone cannot convey.
Capture environmental sound separately from primary narration to maintain mixing flexibility. Use directional microphones to isolate desired environmental sounds from unwanted noise. Record environmental sound at different times of day if possible, as sonic character changes with activity patterns.
Footstep and Interaction Sounds: The sound of footsteps on hardwood versus carpet communicates flooring material more viscerally than any visual shot. The sound of cabinet doors closing communicates build quality. The sound of water running communicates fixture functionality. These interaction sounds provide tactile confirmation of visual information.
Capture interaction sounds naturally during filming rather than adding foley effects in post. Natural interaction sounds carry authentic timing, dynamics, and spatial characteristics that synthetic foley rarely matches. When capturing footstep sounds, wear shoes appropriate to the space to maintain authenticity.
Mixing Ambient Sound for Presence
Captured ambient sound requires thoughtful mixing to enhance rather than distract:
Level Balancing: Ambient sound should be present but not prominent—felt more than heard. Mix ambient beds 12–18 dB below primary narration or music. Adjust per-room based on acoustic character; quieter rooms need lower ambient levels to avoid sounding artificially noisy.
Spatial Positioning: Use stereo or surround panning to position ambient sounds spatially, matching their visual source. Backyard birdsong should come from rear speakers or right channel if the backyard is visible on screen right. This spatial congruence reinforces presence and prevents ambient sound from feeling like an added layer rather than an integral part of the space.
Dynamic Variation: Real ambient sound isn't static—it breathes, shifts, and responds to activity. Automate ambient levels to rise slightly during pauses in narration and fall during speech. This dynamic variation mimics natural listening and prevents ambient sound from becoming monotonous wallpaper.
Transition Smoothing: Crossfade ambient beds between rooms to create smooth sonic transitions that mirror visual transitions. Abrupt ambient changes feel jarring and break immersion. Crossfades of one to two seconds create seamless spatial flow that guides viewers through the property naturally.
Practical Application: For your next home tour, arrive thirty minutes early specifically to capture ambient sound. Record room tone in every space before filming begins. Capture environmental context while setting up. Record interaction sounds naturally during filming. In post, mix ambient beds subtly beneath primary audio, using automation and spatial positioning to create presence without distraction. The result will be videos that feel inhabited rather than exhibited, spaces that breathe rather than pose.
Strategy 2: Optimize Voiceover Delivery for Clarity, Warmth, and Pacing
The second smart way better audio elevates home tour videos is through optimized voiceover delivery that balances clarity, warmth, and pacing to maintain viewer engagement while conveying property information effectively.
The Voiceover as Guide, Not Announcer
Most real estate voiceovers fail because they adopt an announcer cadence—projecting, enunciating, performing—rather than a guide cadence—conversing, sharing, accompanying. Viewers don't want to be announced at; they want to be guided through a space by someone who knows it intimately and cares about their experience.
Guide cadence is characterized by natural rhythm, conversational tone, genuine enthusiasm (not performed excitement), and pacing that matches the visual journey. It feels like walking through the property with a knowledgeable friend, not listening to a commercial. This distinction profoundly affects viewer comfort and trust.
Technical Clarity Foundations
Warmth and personality matter, but they're built on a foundation of technical clarity. Unclear voiceover undermines all other audio investments.
Microphone Selection and Placement: Voiceover clarity starts with appropriate microphone selection. Large-diaphragm condenser microphones capture warmth and detail for studio voiceover. Shotgun microphones provide focused capture for on-location narration. Lavalier microphones enable hands-free mobility for walk-and-talk formats. Each serves different use cases; choose based on recording environment and presentation style.
Microphone placement is equally critical. Maintain consistent distance (six to twelve inches for studio condensers, twelve to eighteen inches for shotguns) to prevent proximity effect bass buildup or excessive room reflection. Use pop filters to eliminate plosives. Position microphones off-axis slightly to reduce sibilance. Consistent placement across sessions ensures tonal consistency throughout the video.
Acoustic Environment Control: Even the best microphone captures poor audio in untreated spaces. Record voiceover in acoustically treated environments whenever possible. Portable reflection filters enable acceptable results in untreated rooms. Avoid recording in empty, reverberant spaces; soft furnishings, blankets, or temporary treatment dramatically improve clarity.
For on-location narration, choose the quietest, least reflective room available. Close windows, turn off HVAC temporarily, and minimize background noise sources. Record multiple takes to allow selection of the cleanest performance.
Gain Staging and Levels: Proper gain staging prevents distortion and noise floor issues. Set input levels so peak vocal levels hit -12 to -6 dBFS, leaving headroom for processing. Monitor levels throughout recording to catch clipping or excessive noise. Record at 24-bit resolution to maximize dynamic range and processing flexibility.
Consistent levels across sessions simplify post-production and prevent jarring volume shifts. Use compression and limiting during recording only if necessary; preserve dynamic range for post-production refinement.
Performance Optimization Techniques
Technical clarity enables performance, but performance optimization requires deliberate technique:
Script Writing for Ear, Not Eye: Scripts written for reading differ fundamentally from scripts written for listening. Write for the ear: shorter sentences, conversational vocabulary, natural transitions, rhythmic variation. Read scripts aloud during drafting to identify awkward phrasing, tongue twisters, and unnatural cadences. Revise until the script sounds like natural speech when read aloud.
Avoid real estate clichés and jargon that viewers tune out. Replace "stunning," "gorgeous," and "must-see" with specific, sensory descriptions that help viewers imagine themselves in the space. "Morning light fills the breakfast nook through east-facing windows" creates mental imagery; "stunning breakfast nook" creates nothing.
Pacing and Rhythm Matching: Voiceover pacing should match visual pacing. Fast-paced montage sequences benefit from brisk, energetic narration. Slow, contemplative room reveals benefit from measured, spacious narration. Mismatched pacing creates cognitive friction that distracts from both audio and visual content.
Vary pacing within videos to maintain engagement. Monotone pacing, whether fast or slow, fatigues listeners. Strategic acceleration and deceleration create rhythmic interest that sustains attention. Pause before key features to create anticipation. Pause after key features to allow absorption. Silence is punctuation; use it deliberately.
Authentic Enthusiasm Calibration: Genuine enthusiasm engages; performed enthusiasm repels. Calibrate enthusiasm to match property character and target audience expectations. Luxury properties benefit from refined, understated appreciation. Family homes benefit from warm, welcoming energy. Fixer-uppers benefit from honest, optimistic potential-focused narration.
Authentic enthusiasm comes from genuine appreciation of the property's qualities. Before recording, spend time in the space identifying features you genuinely appreciate. Narrate from that appreciation rather than performing excitement you don't feel. Viewers detect authenticity instantly; performed enthusiasm triggers skepticism.
Breath Management and Edit Points: Natural breathing supports vocal warmth and prevents fatigue. Don't edit out all breaths; selective breath retention maintains naturalness. Edit breaths that are distracting, gasping, or poorly timed. Leave breaths that support phrase boundaries and natural rhythm.
Plan edit points during recording. Mark script sections where clean edits are possible. Record multiple takes of challenging phrases. Leave handles (extra recorded material before and after intended edit points) to enable smooth editing. Clean edit points prevent audible artifacts that break immersion.
Practical Application: Before your next voiceover session, rewrite your script for the ear. Read it aloud multiple times, revising until it flows naturally. Choose the appropriate microphone for your recording environment. Treat your recording space acoustically, even minimally. During recording, focus on guide cadence rather than announcer performance. Match pacing to visual rhythm. Calibrate enthusiasm authentically. In post, preserve natural breaths that support rhythm while removing distractions. The result will be voiceover that feels like conversation rather than presentation, guiding viewers through properties with warmth, clarity, and genuine engagement.
Strategy 3: Implement Strategic Music Selection That Supports Rather Than Competes
The third smart way better audio elevates home tour videos is through strategic music selection that supports the property narrative and emotional arc without competing with voiceover or overwhelming ambient sound.
Music as Emotional Scaffolding
Music in home tour videos serves as emotional scaffolding—it provides the underlying emotional structure that shapes how viewers interpret visual and verbal information. The right music makes spaces feel aspirational, comfortable, luxurious, or cozy depending on the property and target audience. The wrong music creates emotional dissonance that undermines the entire presentation.
Music selection isn't about finding tracks you personally enjoy; it's about selecting music that serves the property's emotional narrative and target audience's aspirations. This requires analytical thinking about property positioning, buyer psychology, and emotional architecture.
Genre and Mood Alignment
Music genre and mood must align with property character and target buyer profile:
Luxury Properties: Luxury buyers aspire to sophistication, exclusivity, and refined taste. Music should reflect these aspirations through minimalist arrangements, classical or jazz influences, restrained dynamics, and premium production quality. Avoid trendy pop, aggressive beats, or casual genres that undermine luxury positioning. Tempo should be moderate to slow, allowing space for visual appreciation and voiceover absorption.
Family Homes: Family buyers seek warmth, safety, and belonging. Music should convey these feelings through acoustic instrumentation, major key tonality, gentle rhythms, and accessible melodies. Avoid cold electronic production, minor keys, or complex arrangements that feel impersonal. Tempo should be moderate, matching the pace of family life rather than nightlife energy.
Modern/Contemporary Properties: Modern property buyers value clean lines, innovation, and forward-thinking design. Music should reflect these values through contemporary production, clean mixes, subtle electronic elements, and sophisticated arrangements. Avoid dated genres, overly ornate arrangements, or traditional instrumentation that conflicts with modern aesthetics. Tempo can vary but should feel current and intentional.
Historic/Character Properties: Historic property buyers appreciate craftsmanship, heritage, and timeless quality. Music should honor these qualities through period-appropriate instrumentation, organic production, warm tonality, and respectful arrangements. Avoid modern electronic production, trendy genres, or arrangements that trivialize historic character. Tempo should feel unhurried, allowing appreciation of architectural details.
Volume and Dynamic Management
Music volume and dynamics require careful management to support rather than compete:
Voiceover Priority: Voiceover must remain intelligible and prominent. Music should sit beneath voiceover, providing emotional context without obscuring information. Mix music 15–20 dB below voiceover during narration. Increase music volume during visual-only sequences where no voiceover competes. Automate volume adjustments to maintain consistent voiceover intelligibility throughout varying musical dynamics.
Dynamic Range Preservation: Avoid over-compressing music to maintain consistent volume. Preserved dynamic range allows music to breathe and respond to visual pacing. Compressed music fatigues listeners and reduces emotional impact. Use volume automation rather than compression to manage level variations.
Frequency Space Management: Music and voiceover occupy overlapping frequency ranges. Use EQ to carve space for voiceover in music mixes. Reduce midrange frequencies (300 Hz–3 kHz) in music during voiceover sections to prevent masking. Preserve low-end warmth and high-end sparkle while clearing vocal range. This frequency management maintains musical fullness while ensuring voiceover clarity.
Arrangement Awareness: Select music with arrangements that accommodate voiceover. Dense, busy arrangements compete with narration regardless of volume. Sparse arrangements with open midrange provide emotional support without competition. Listen to potential tracks with voiceover overlaid before finalizing selection; what works alone may fail in context.
Licensing and Legal Compliance
Music licensing is non-negotiable. Unlicensed music risks copyright claims, video takedowns, demonetization, and legal liability. Several licensing approaches serve real estate video needs:
Royalty-Free Libraries: Royalty-free libraries offer pre-cleared music for one-time fees or subscriptions. Quality varies widely; audition extensively before committing. Ensure licenses cover intended use (commercial real estate marketing, online distribution, broadcast if applicable). Read license terms carefully; some restrict usage types or require attribution.
Custom Composition: Custom composition provides unique music tailored to specific properties or brand identity. Higher cost but eliminates licensing concerns and creates distinctive audio branding. Consider custom composition for luxury properties, flagship listings, or agency brand videos where distinctive audio identity justifies investment.
Public Domain and Creative Commons: Public domain and Creative Commons music offers free or low-cost options with varying restrictions. Verify public domain status independently; assumptions lead to infringement. Respect Creative Commons license terms; some require attribution or prohibit commercial use. Quality varies; curate carefully.
Original Production: Creating original music eliminates all licensing concerns and creates proprietary audio assets. Requires musical skill or collaboration with composers. Original music becomes brand asset usable across multiple videos and marketing channels. Investment amortizes across usage; long-term value exceeds per-track licensing costs.
Practical Application: For your next home tour, select music before editing begins. Analyze property character and target buyer profile to determine appropriate genre and mood. Audition multiple tracks with voiceover overlaid to assess compatibility. Secure proper licensing before use. During editing, automate music volume to prioritize voiceover intelligibility. Use EQ to carve vocal space in music mixes. Preserve dynamic range through volume automation rather than compression. The result will be music that enhances emotional impact without competing for attention, supporting the property narrative while maintaining audio clarity.
Strategy 4: Eliminate Distracting Noise Through Proactive Capture and Post-Production Cleanup
The fourth smart way better audio elevates home tour videos is through systematic elimination of distracting noise via proactive capture practices and targeted post-production cleanup that preserves audio quality while removing interruptions that break viewer immersion.
The Cost of Distracting Noise
Distracting noise—HVAC rumble, traffic bleed, appliance hum, wind buffeting, handling noise, electrical interference—accumulates insidiously. Individual noises may seem minor during filming, but they compound in post-production and become glaringly obvious during quiet viewing environments. Each distraction pulls attention from the property, breaks immersion, and signals amateur production.
More damaging than individual distractions is their cumulative effect on perceived quality. Viewers may not identify specific noise sources, but they register overall audio quality as "noisy," "unclean," or "unprofessional." This global quality impression affects trust and engagement regardless of visual quality.
Proactive Noise Prevention
Prevention is always superior to correction. Invest time in noise prevention during capture to minimize post-production remediation:
Location Scouting for Audio: Scout locations with audio in mind, not just visuals. Identify noise sources: HVAC systems, appliances, traffic routes, construction, neighbors, wildlife. Schedule filming during quietest periods. Request HVAC shutdown during critical recording if possible. Choose rooms furthest from noise sources for voiceover recording.
Audio scouting adds fifteen to thirty minutes per property but saves hours of post-production cleanup and prevents irreparable audio damage. This upfront investment yields exponential returns in final quality.
Equipment Handling Discipline: Handling noise—microphone bumps, cable rustling, stand adjustments, clothing friction—is entirely preventable through disciplined technique. Secure cables to prevent movement noise. Use shock mounts to isolate microphones from stand vibration. Wear quiet clothing during on-camera narration. Handle equipment deliberately and silently. Practice silent operation until it becomes habitual.
Train all crew members in silent operation protocols. Handling noise often comes from assistants, clients, or bystanders unaware of audio sensitivity. Brief everyone before filming begins. Designate quiet zones and quiet periods. Silent operation is a team discipline, not just an individual skill.
Wind and Environmental Protection: Outdoor filming requires wind protection. Foam windscreens handle light breeze. Furry windshields (dead cats) handle moderate wind. Blimp-style zeppelin systems handle strong wind. Never film outdoors without appropriate wind protection; wind buffeting is nearly impossible to clean in post without degrading desired audio.
Position microphones sheltered from direct wind when possible. Use natural windbreaks (walls, vegetation, structures). Monitor audio through headphones continuously during outdoor filming; wind issues are immediately apparent through monitoring but invisible to camera operators.
Electrical Interference Mitigation: Electrical interference manifests as hum, buzz, or RF artifacts. Identify interference sources during setup: fluorescent lights, dimmer switches, power supplies, wireless devices, cell phones. Move microphones and cables away from interference sources. Use balanced cables (XLR) rather than unbalanced (1/4", RCA) for noise rejection. Power audio equipment from clean power sources; avoid shared circuits with lighting or appliances.
Test audio before filming to identify interference. Troubleshoot systematically: isolate equipment, swap cables, change power sources, relocate microphones. Fifteen minutes of troubleshooting prevents hours of unusable footage.
Post-Production Noise Cleanup
Despite best prevention efforts, some noise requires post-production cleanup. Modern tools enable effective cleanup when applied judiciously:
Spectral Editing: Spectral editing tools visualize audio frequency content over time, enabling precise identification and removal of isolated noises without affecting surrounding audio. Remove phone rings, door slams, coughs, and other discrete events through spectral editing rather than broadband noise reduction that degrades overall quality.
Spectral editing requires practice and patience. Over-aggressive editing creates artifacts worse than original noise. Learn conservative techniques; preserve audio integrity over perfect noise removal. Sometimes partial reduction is preferable to artifact-prone elimination.
Broadband Noise Reduction: Broadband noise reduction addresses persistent background noise: HVAC rumble, traffic hum, electrical hiss. Apply conservatively; excessive reduction creates watery, artificial artifacts. Use multi-band processors targeting specific frequency ranges rather than full-spectrum reduction. Profile noise during quiet sections to create accurate reduction curves.
Apply noise reduction before other processing. Noise reduction interacts with compression, EQ, and reverb; processing order affects results. Establish clean baseline before creative processing.
De-Essing and De-Plosive Processing: Sibilance (harsh "s" sounds) and plosives ("p," "b" bursts) distract from voiceover clarity. De-essers reduce sibilance dynamically; de-plosive processors attenuate plosive transients. Apply during voiceover processing chain after noise reduction and EQ.
Adjust de-esser thresholds carefully; over-processing creates lisping artifacts. Target only problematic frequencies; preserve natural sibilance that contributes to speech intelligibility. De-essing is corrective, not eliminative.
Volume Automation for Noise Masking: Strategic volume automation masks residual noise during quiet sections. Raise music or ambient beds slightly during voiceover pauses to cover noise floors. Lower during speech to maintain clarity. Automation creates dynamic masking that feels natural rather than artificial.
Volume automation requires attentive listening throughout the video. Automated solutions miss contextual nuances; manual automation yields superior results. Budget time for detailed pass; this polish distinguishes professional from amateur audio.
Practical Application: Before your next shoot, scout for audio issues and schedule during quiet periods. Brief all participants on silent operation. Deploy appropriate wind protection outdoors. Test for electrical interference before filming. In post, address discrete noises through spectral editing before applying broadband reduction. Process voiceover with de-essing and de-plosive treatment. Use volume automation to mask residual noise naturally. The result will be clean, professional audio that maintains viewer immersion throughout the video.
Strategy 5: Create Consistent Audio Branding Across Your Video Portfolio
The fifth smart way better audio elevates home tour videos is through consistent audio branding that creates recognizable identity across your video portfolio, building audience familiarity and trust through sonic consistency.
Audio Branding as Identity Infrastructure
Visual branding receives extensive attention in real estate marketing: logos, color palettes, typography, photography styles. Audio branding receives minimal attention despite being equally influential in shaping audience perception and memory. Consistent audio branding creates sonic identity that viewers associate with your brand before conscious recognition occurs.
Audio branding encompasses multiple elements: intro/outro music, voiceover style, ambient treatment approach, mixing aesthetic, and sonic logo or mnemonic. Consistency across these elements creates cohesive audio identity that reinforces visual branding and builds cumulative recognition.
Developing Your Sonic Identity
Sonic identity development requires intentional decisions about audio characteristics that represent your brand:
Voiceover Style Definition: Define voiceover characteristics that align with brand positioning: tone (warm, authoritative, conversational, refined), pacing (brisk, measured, varied), gender, age, accent. Document these characteristics in brand guidelines to ensure consistency across videos and narrators.
If using multiple narrators, establish shared characteristics while allowing individual personality. Consistency doesn't mean uniformity; it means recognizable family resemblance. Train narrators on brand voice guidelines. Provide reference examples. Review performances against guidelines before approval.
Music Palette Curation: Curate a music palette of approved tracks, genres, and moods that align with brand identity. This palette becomes the sonic vocabulary of your video portfolio. New videos draw from this palette rather than selecting music ad hoc. Curated palettes ensure consistency while allowing variety within defined boundaries.
Update palettes periodically to prevent staleness while maintaining identity. Seasonal refreshes keep audio current without abandoning brand recognition. Archive retired tracks for potential future use; trends cycle and retired tracks may return to relevance.
Mixing Aesthetic Standardization: Standardize mixing approaches across videos: voiceover level relative to music, ambient bed levels, EQ curves, compression settings, reverb characteristics. Document standard settings in technical guidelines. Consistent mixing creates sonic cohesion that viewers recognize subconsciously.
Allow mixing variations for property-specific needs while maintaining overall aesthetic. Luxury properties may warrant more spacious reverb; family homes may benefit from drier intimacy. Variations serve content while adhering to brand aesthetic framework.
Sonic Logo or Mnemonic Development: Consider developing a brief sonic logo or mnemonic (three to five seconds) that appears consistently in intros, outros, or transitions. Sonic logos create instant brand recognition independent of visual logos. They trigger brand association through auditory memory pathways that operate faster than visual recognition.
Sonic logos should be simple, distinctive, and emotionally aligned with brand identity. Commission custom composition or adapt existing licensed music. Test sonic logos with target audiences for recognition and emotional response. Refine based on feedback before full deployment.
Implementation Across Portfolio
Audio branding requires systematic implementation across all video content:
Template Creation: Create audio templates incorporating branded elements: intro/outro music, sonic logo, standard mixing settings, ambient bed presets. Templates accelerate production while ensuring consistency. Customize templates per property type while maintaining branded foundation.
Update templates as brand evolves. Version control prevents outdated templates from contaminating new productions. Archive superseded templates for historical reference.
Quality Control Processes: Implement audio quality control checkpoints in production workflows. Review audio against brand guidelines before publication. Check consistency with previous videos. Flag deviations for correction or intentional exception documentation.
Quality control prevents gradual drift that erodes brand consistency over time. Assign quality control responsibility to specific team members. Document standards clearly to enable objective evaluation.
Audience Feedback Integration: Monitor audience feedback regarding audio elements. Comments about voiceover, music, or overall audio quality provide valuable brand perception data. Integrate feedback into brand guideline updates. Audience response validates or challenges internal assumptions about audio branding effectiveness.
Feedback integration keeps audio branding aligned with audience expectations rather than internal preferences. Brands serve audiences; audio branding should reflect audience response, not just creator intent.
Practical Application: Audit your existing video portfolio for audio consistency. Identify inconsistencies in voiceover style, music selection, mixing approach, and overall sonic character. Define brand audio guidelines addressing each element. Create templates incorporating branded elements. Implement quality control checkpoints. Test branded elements with target audiences. Refine based on feedback. Deploy consistently across new productions. The result will be a video portfolio with recognizable sonic identity that builds cumulative brand recognition and trust through audio consistency.
Strategy 6: Optimize Audio for Platform-Specific Playback Environments
The sixth smart way better audio elevates home tour videos is through platform-specific audio optimization that accounts for varying playback devices, compression algorithms, and listening environments where viewers actually consume content.
The Playback Reality Gap
Most home tour videos are mixed on studio monitors in treated rooms, then consumed on smartphone speakers, laptop speakers, car stereos, Bluetooth headphones, and smart TVs in noisy environments. This playback reality gap means carefully crafted audio translates poorly to actual listening conditions unless optimized for target platforms.
Platform optimization isn't dumbing down audio; it's ensuring audio communicates effectively across diverse playback scenarios. What sounds pristine in studio may be unintelligible on phone speakers. What feels spacious on monitors may disappear on laptops. Platform optimization bridges this gap.
Platform-Specific Considerations
Different platforms impose different technical constraints and listening contexts:
Mobile Devices (Smartphones, Tablets): Mobile speakers have limited frequency response, particularly in bass and extreme highs. Mono compatibility is essential; stereo separation collapses on single-speaker playback. Voiceover must be prominent and midrange-focused to survive small speaker reproduction. Bass-heavy music loses impact; midrange-forward mixes translate better.
Test mixes on actual mobile devices, not just studio monitors. Listen at typical mobile volumes (often lower than studio reference levels). Ensure voiceover remains intelligible at low volumes. Check mono compatibility by summing stereo mix to mono; phase cancellation issues become apparent.
Social Media Platforms (Instagram, TikTok, Facebook, YouTube Shorts): Social platforms apply aggressive audio compression that reduces dynamic range and alters frequency balance. Loudness normalization adjusts playback volume to platform standards; mixes that are too quiet get boosted (increasing noise floor), mixes that are too loud get reduced (losing dynamic impact).
Target platform-specific loudness standards: -14 LUFS integrated for YouTube, -16 LUFS for Spotify, platform-documented standards for social platforms. Use loudness meters during mastering to hit targets accurately. Preserve dynamic range within loudness targets; over-compression to achieve loudness sacrifices clarity and causes platform normalization artifacts.
Social media viewing often occurs without headphones in noisy environments. Voiceover must cut through ambient noise. Boost midrange presence (2–5 kHz) for voiceover intelligibility in noisy conditions. Ensure critical information remains audible despite environmental masking.
Desktop and Laptop Playback: Laptop speakers share mobile limitations but with slightly better bass response. Desktop setups vary widely from basic monitor speakers to high-quality external systems. Mixes should translate acceptably across this range.
Test on multiple computer speaker configurations. Ensure bass elements don't disappear on laptop speakers while remaining controlled on better systems. Midrange clarity remains priority across all computer playback scenarios.
Television and Streaming Devices: TV speakers are typically thin and midrange-focused, though soundbars and home theater systems improve reproduction. Streaming platforms apply their own compression and normalization.
Mix for TV speaker translation as baseline; enhanced systems will reproduce additional detail. Ensure dialogue clarity on TV speakers; this is primary consumption mode for many real estate videos. Test on actual TV speakers when possible; studio monitor translation to TV speakers is unreliable.
Technical Optimization Workflow
Platform optimization requires systematic workflow integration:
Reference Monitoring: Maintain reference playback devices representing target platforms: smartphone, laptop, TV speaker, Bluetooth headphones. Check mixes on each reference regularly during production. Don't rely solely on studio monitors; they represent best-case scenario, not typical consumption.
Document reference check results. Note issues specific to each platform. Address issues through mix adjustments rather than accepting poor translation. Reference monitoring adds time but prevents publishing audio that fails on target platforms.
Loudness Metering and Compliance: Integrate loudness metering into mastering workflow. Target platform-specific loudness standards. Use true peak limiting to prevent clipping during platform transcoding. Measure integrated loudness, short-term loudness, and true peak levels.
Loudness compliance prevents platform normalization artifacts and ensures consistent playback volume across your video portfolio. Viewers shouldn't adjust volume between your videos; consistent loudness creates professional impression.
Format and Codec Awareness: Understand platform audio format and codec specifications. Some platforms transcode uploaded audio, potentially degrading quality. Upload highest quality source files platforms accept. Understand transcoding implications; test uploaded versions to verify quality preservation.
Archive high-resolution masters independent of platform-delivered versions. Platform quality may change; masters enable future re-delivery at improved quality. Master preservation protects long-term asset value.
A/B Testing Across Platforms: Test published videos across target platforms and devices. Compare audio quality to studio reference. Identify platform-specific degradation. Document issues for future optimization.
A/B testing reveals real-world performance that studio monitoring cannot predict. Regular testing maintains awareness of platform changes and ensures continued optimization effectiveness.
Practical Application: Establish reference monitoring setup representing your primary consumption platforms. Integrate loudness metering into mastering workflow targeting platform standards. Test every video on reference devices before publication. Upload highest quality source files. Test published versions across platforms. Document platform-specific issues and optimize future productions accordingly. The result will be audio that translates effectively across diverse playback environments, maintaining quality and intelligibility wherever viewers consume your content.
Strategy 7: Leverage Audio Analytics to Drive Continuous Improvement
The seventh smart way better audio elevates home tour videos is through systematic audio analytics that transform subjective impressions into objective data, enabling continuous improvement based on measurable performance rather than guesswork.
Beyond Subjective Assessment
Audio quality assessment in real estate video typically relies on subjective impressions: "sounds good," "could be clearer," "music feels right." Subjective assessment is valuable but insufficient for systematic improvement. Audio analytics provide objective metrics that reveal what's working, what isn't, and why.
Analytics bridge the gap between production decisions and audience response. They transform audio from artistic intuition into measurable business lever. Data-informed audio optimization yields compounding improvements that subjective iteration cannot match.
Key Audio Metrics for Real Estate Video
Several metrics provide actionable insight into audio performance:
Watch Time and Retention Correlation: Analyze watch time and retention curves relative to audio characteristics. Do videos with clearer voiceover retain viewers longer? Do videos with strategic music maintain engagement through middle sections where retention typically drops? Do videos with authentic ambient sound show higher completion rates?
Correlate audio variables with retention data across your video portfolio. Identify audio characteristics associated with superior retention. Replicate successful characteristics; revise or eliminate unsuccessful ones. Retention correlation reveals which audio investments yield measurable engagement returns.
Engagement Metric Analysis: Analyze likes, comments, shares, and inquiries relative to audio characteristics. Do certain voiceover styles generate more comments? Does specific music correlate with higher share rates? Do videos with particular audio branding elements receive more inquiries?
Engagement metrics indicate emotional response and motivation. Audio characteristics driving engagement deserve emphasis; those failing to drive engagement deserve revision. Engagement analysis connects audio decisions to business outcomes.
Platform-Specific Performance Comparison: Compare audio performance across platforms. Does the same video perform differently on YouTube versus Instagram? Do platform-specific optimizations improve performance? Are certain audio characteristics more effective on specific platforms?
Platform comparison reveals optimization opportunities and platform-audience alignment. Tailor audio strategies per platform based on performance data rather than assuming universal effectiveness.
Audience Feedback Sentiment Analysis: Analyze comments and direct messages for audio-related feedback. Do viewers mention audio quality positively or negatively? Are there recurring complaints or praises? Does feedback correlate with specific audio characteristics?
Sentiment analysis provides qualitative context complementing quantitative metrics. Numbers reveal what happened; sentiment reveals why. Combined analysis enables nuanced optimization that pure metrics miss.
Conversion Attribution: Track inquiries, showings, and closings attributable to specific videos. Correlate conversion rates with audio characteristics. Do videos with particular audio profiles generate more qualified leads? Does audio quality affect lead quality, not just quantity?
Conversion attribution connects audio directly to revenue. This is ultimate ROI measurement. Audio investments justified by conversion data receive continued funding; those lacking conversion justification receive revision or reallocation.
Implementing Audio Analytics Systems
Effective audio analytics require systematic implementation:
Metric Definition and Tracking: Define specific audio metrics aligned with business objectives. Establish tracking mechanisms: platform analytics, CRM integration, survey instruments, comment monitoring. Collect data consistently across all videos.
Inconsistent data collection prevents meaningful analysis. Standardize tracking protocols. Document metric definitions to ensure consistent interpretation. Regular data collection enables trend analysis over time.
Analysis Cadence and Review: Establish regular analysis cadence: weekly quick reviews, monthly deep dives, quarterly strategic assessments. Assign analysis responsibility to specific team members. Document findings and action items.
Regular analysis prevents data accumulation without insight. Scheduled reviews ensure data informs decisions rather than sitting unused. Documentation creates institutional knowledge that survives personnel changes.
Testing and Experimentation Framework: Implement structured testing to isolate audio variable effects. A/B test voiceover styles, music selections, mixing approaches, and ambient treatments. Control other variables to isolate audio impact. Document test designs, results, and conclusions.
Structured testing replaces guesswork with evidence. Evidence-based optimization compounds; guesswork-based optimization stagnates. Testing framework enables systematic learning that accelerates improvement.
Feedback Loop Integration: Close the loop between analysis and production. Analysis insights must inform future production decisions. Document lessons learned. Update guidelines based on findings. Train team members on updated approaches.
Analysis without implementation is wasted effort. Feedback loops ensure data drives action. Continuous improvement requires closed loops, not open-ended data collection.
Practical Application: Define audio metrics aligned with your business objectives. Implement tracking across your video portfolio. Establish regular analysis cadence. Conduct structured tests isolating audio variables. Document findings and integrate into production guidelines. Close feedback loops between analysis and production. The result will be continuous, data-informed audio improvement that compounds over time, transforming audio from subjective art into measurable business advantage.
Conclusion: Audio as Competitive Advantage in Real Estate Video
Better audio isn't a production nicety—it's a competitive advantage. In markets saturated with visually competent but sonically mediocre home tour videos, superior audio differentiates your content, elevates your brand, and drives measurable business results. The seven strategies outlined here—ambient sound capture, voiceover optimization, strategic music selection, noise elimination, audio branding, platform optimization, and analytics-driven improvement—form a comprehensive framework for audio excellence that transforms home tour videos from commodity content into conversion-generating assets.
The investment required is modest relative to returns. Better microphones, acoustic treatment, training, and post-production tools cost fractions of typical real estate marketing budgets. Yet audio improvements yield disproportionate returns through increased watch time, higher trust, stronger emotional connection, and improved conversion rates. The ROI on audio investment often exceeds visual upgrades because audio affects viewer psychology at deeper, faster, and more durable levels.
More importantly, audio excellence signals professionalism and respect for viewers' time and attention. In an industry where trust determines which agent gets the call, audio quality communicates competence, care, and commitment to quality that visuals alone cannot convey. Viewers may not consciously choose agents based on audio quality, but audio shapes their perception of trustworthiness at subconscious levels that drive decision-making.
The opportunity is now. Most real estate video creators haven't yet recognized audio's strategic importance. Early adopters of audio excellence gain competitive advantage that compounds as audiences develop expectations and associations. The window for differentiation through audio won't remain open indefinitely; as audio quality rises across the industry, excellence becomes table stakes rather than differentiator.
Start today. Implement one strategy from this guide on your next home tour. Measure results. Iterate. Add additional strategies progressively. Within months, your video portfolio will stand apart through audio quality that viewers feel even if they can't articulate why. That feeling—that sense of professionalism, trust, and emotional connection—is the sound of competitive advantage.
Listen to your videos critically. Then make them sound as good as they look. Your viewers—and your business—will thank you.
Frequently Asked Questions (FAQs)
Why does audio matter more than visuals in home tour videos?
Audio matters more than visuals not because visuals are unimportant, but because audio processes faster in the brain, sets emotional frames before visual registration completes, and determines early retention more strongly than visual quality. Viewers tolerate imperfect visuals far longer than poor audio because bad audio is physically uncomfortable while imperfect visuals are merely aesthetically suboptimal. Audio also conveys spatial information, emotional context, and professionalism signals that visuals alone cannot communicate. In competitive markets where visual quality has reached parity among creators, audio becomes the primary differentiator influencing viewer trust, engagement, and conversion. Investing in audio yields disproportionate returns because it affects viewer psychology at deeper, faster levels than visual improvements.
What equipment do I need for professional home tour audio?
Professional home tour audio requires appropriate tools for each capture scenario: large-diaphragm condenser microphone for studio voiceover, shotgun microphone for on-location narration, lavalier microphone for walk-and-talk formats, portable recorder for ambient sound capture, wind protection for outdoor filming, shock mounts and pop filters for noise prevention, and closed-back headphones for monitoring. Acoustic treatment (portable reflection filters, blankets, or dedicated treatment) improves voiceover clarity. Post-production requires DAW software, noise reduction plugins, EQ, compression, and loudness metering. Total investment ranges from $500–$2,000 depending on existing equipment and quality tier. Equipment matters, but technique and workflow matter more; excellent technique with modest equipment outperforms poor technique with expensive gear.
How do I choose the right music for home tour videos?
Choose music based on property character and target buyer profile, not personal preference. Luxury properties suit minimalist, classical, or jazz-influenced music with restrained dynamics. Family homes suit warm acoustic music with accessible melodies. Modern properties suit contemporary production with clean mixes. Historic properties suit period-appropriate instrumentation with organic production. Always audition music with voiceover overlaid to assess compatibility. Secure proper licensing through royalty-free libraries, custom composition, or verified public domain sources. Mix music 15–20 dB below voiceover during narration, increase during visual-only sequences. Use EQ to carve vocal space in music mixes. Music should support emotional narrative without competing for attention.
How do I eliminate distracting noise from home tour videos?
Eliminate noise through prevention first, correction second. Prevent noise through location scouting for audio issues, scheduling during quiet periods, equipment handling discipline, wind protection outdoors, and electrical interference mitigation. Correct residual noise through spectral editing for discrete sounds, broadband noise reduction for persistent background noise, de-essing for sibilance, and volume automation for natural masking. Apply noise reduction conservatively; over-processing creates artifacts worse than original noise. Always monitor audio through headphones during filming to catch issues immediately. Fifteen minutes of prevention saves hours of correction and prevents irreparable damage.
How do I maintain consistent audio branding across my video portfolio?
Maintain audio branding through documented guidelines covering voiceover style, music palette, mixing aesthetic, and sonic identity elements. Create templates incorporating branded elements for efficient, consistent production. Implement quality control checkpoints reviewing audio against guidelines before publication. Train all team members on brand audio standards. Monitor audience feedback regarding audio elements and integrate into guideline updates. Update palettes and templates periodically to prevent staleness while maintaining identity. Consistency builds cumulative recognition and trust; inconsistency erodes brand equity. Audio branding requires systematic implementation, not ad hoc decisions.
How do I optimize audio for different platforms where viewers watch home tours?
Optimize for platforms through reference monitoring on actual target devices, platform-specific loudness targeting, mono compatibility checking, and format-aware uploading. Mobile devices require midrange-focused mixes with mono compatibility. Social platforms require loudness compliance (-14 to -16 LUFS integrated) and noise-resistant voiceover. TV speakers require dialogue clarity prioritization. Test every video on reference devices before publication. Upload highest quality source files platforms accept. Understand platform transcoding implications. Regular A/B testing across platforms reveals optimization opportunities. Platform optimization ensures audio communicates effectively wherever viewers consume content, not just in studio monitoring environments.
Share
What's Your Reaction?
 Like
0
Like
0
 Dislike
0
Dislike
0
 Love
0
Love
0
 Funny
0
Funny
0
 Angry
0
Angry
0
 Sad
0
Sad
0
 Wow
0
Wow
0